Wednesday, December 17, 2014

Halloween and Thanksgiving

One of my best friends adores Halloween. Here's a card I made for her using my new favorite sentiment.


My husband and I spent the month of October in Seattle helping our older son's family move into their first house. I made this chef outfit for our grandson's Halloween costume.


I love Thanksgiving and although our dinner party is usually small, I still enjoy making fun favors. These Indian corn goodies were inspired by a photo on Pinterest.


Here's our feast for four!


A Few More Cards

Here are a couple of baby cards and a get well card that were recently sent (sorry for the wonkiness of my photography).


Saturday, August 30, 2014

Thank You Cards, Birthdays, and Get Well.

My craft room has been in a state of disarray because I've been rearranging my desk to give me more work surface. It's finally finished and I was back to making cards. The first two are thank you cards with a summer beach theme. 


My sister's birthday was Tuesday and my oldest son's is tomorrow. I used some pieces I'd experimented on a while back in each.
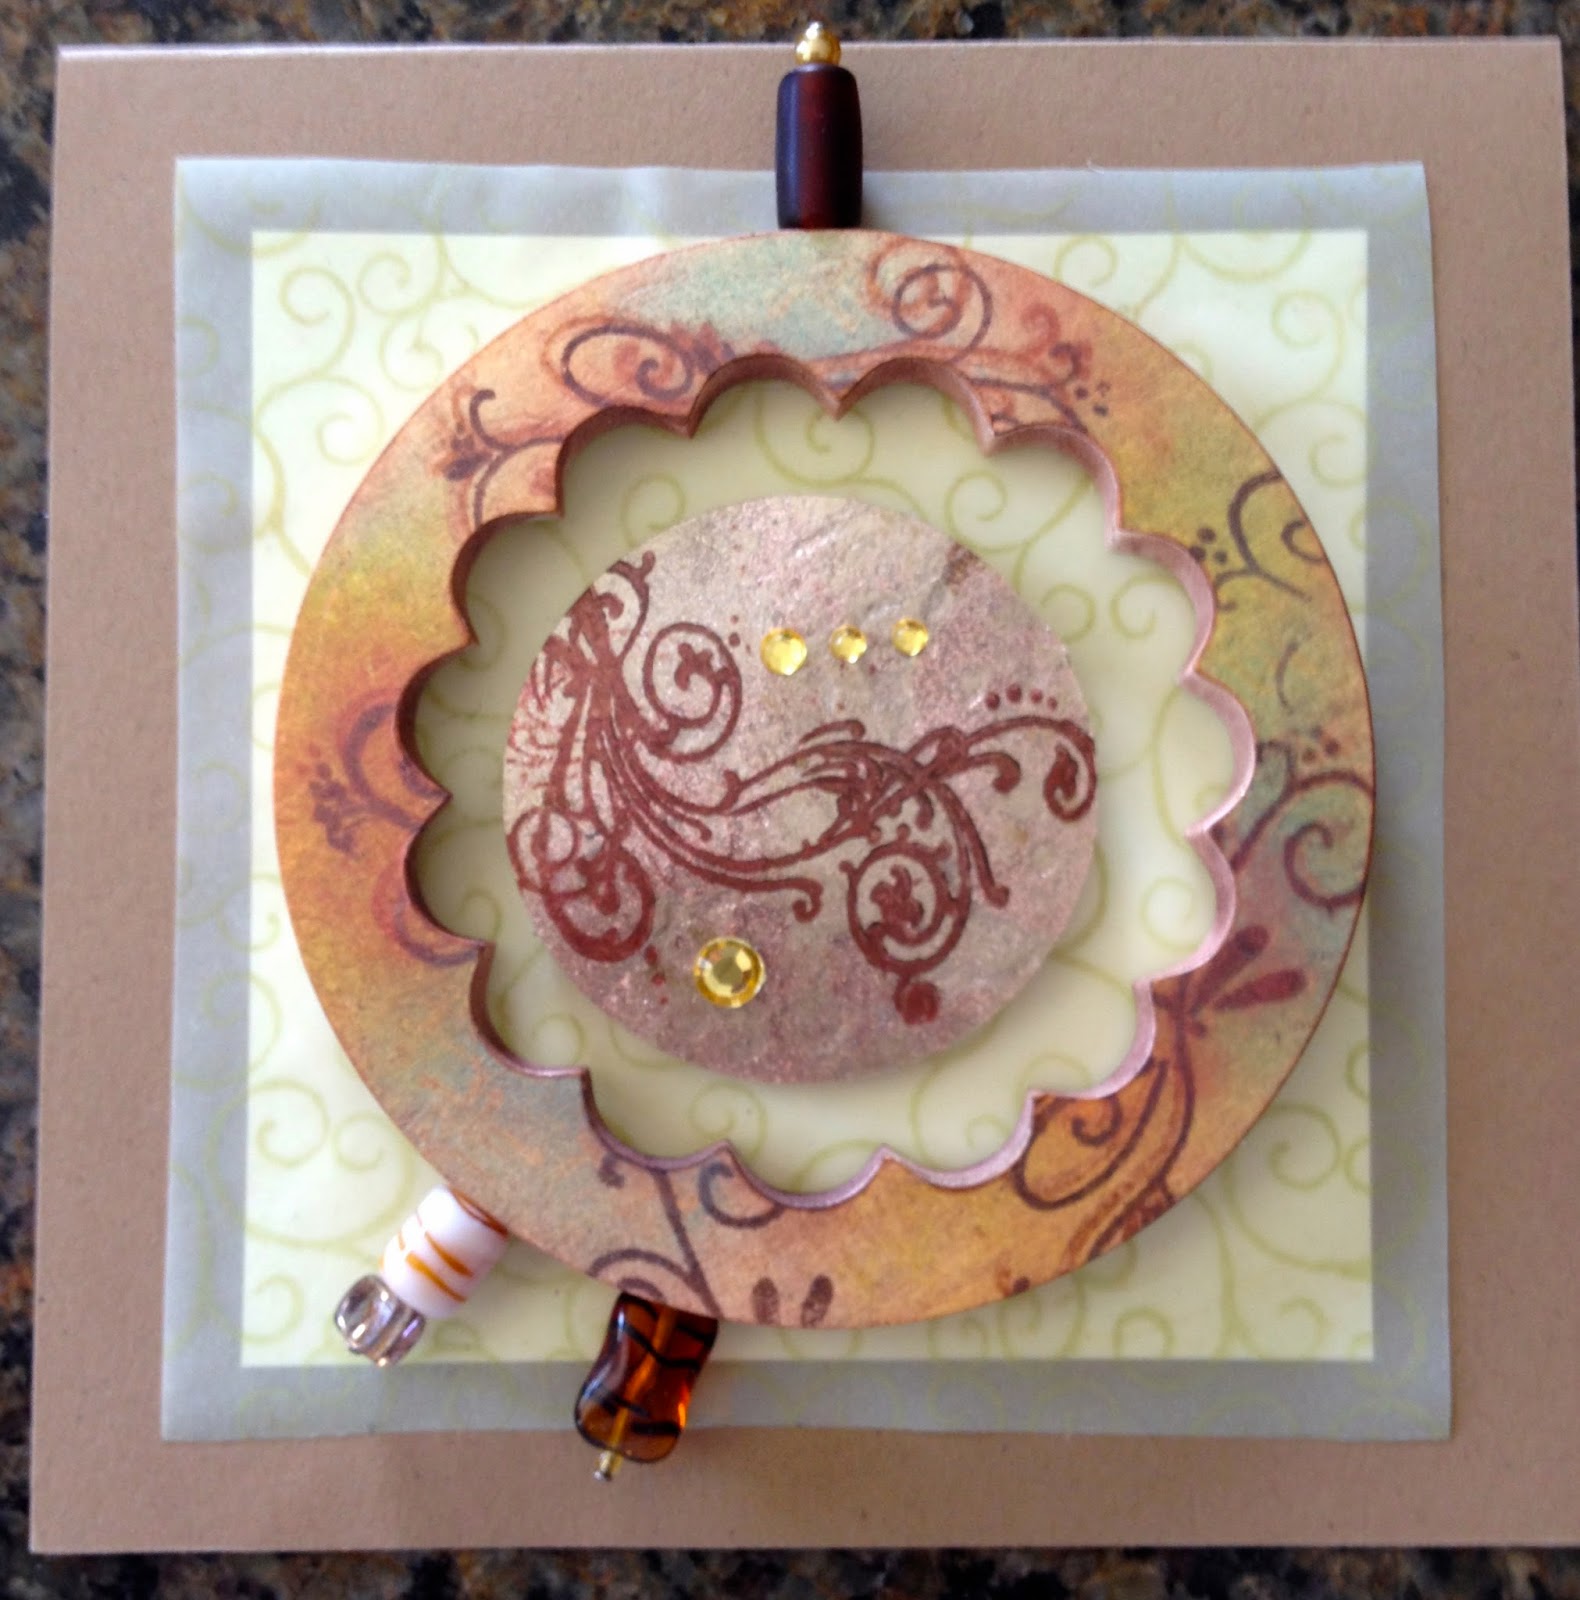
Cutting this circle frame from a thick foam board was a bit tricky.
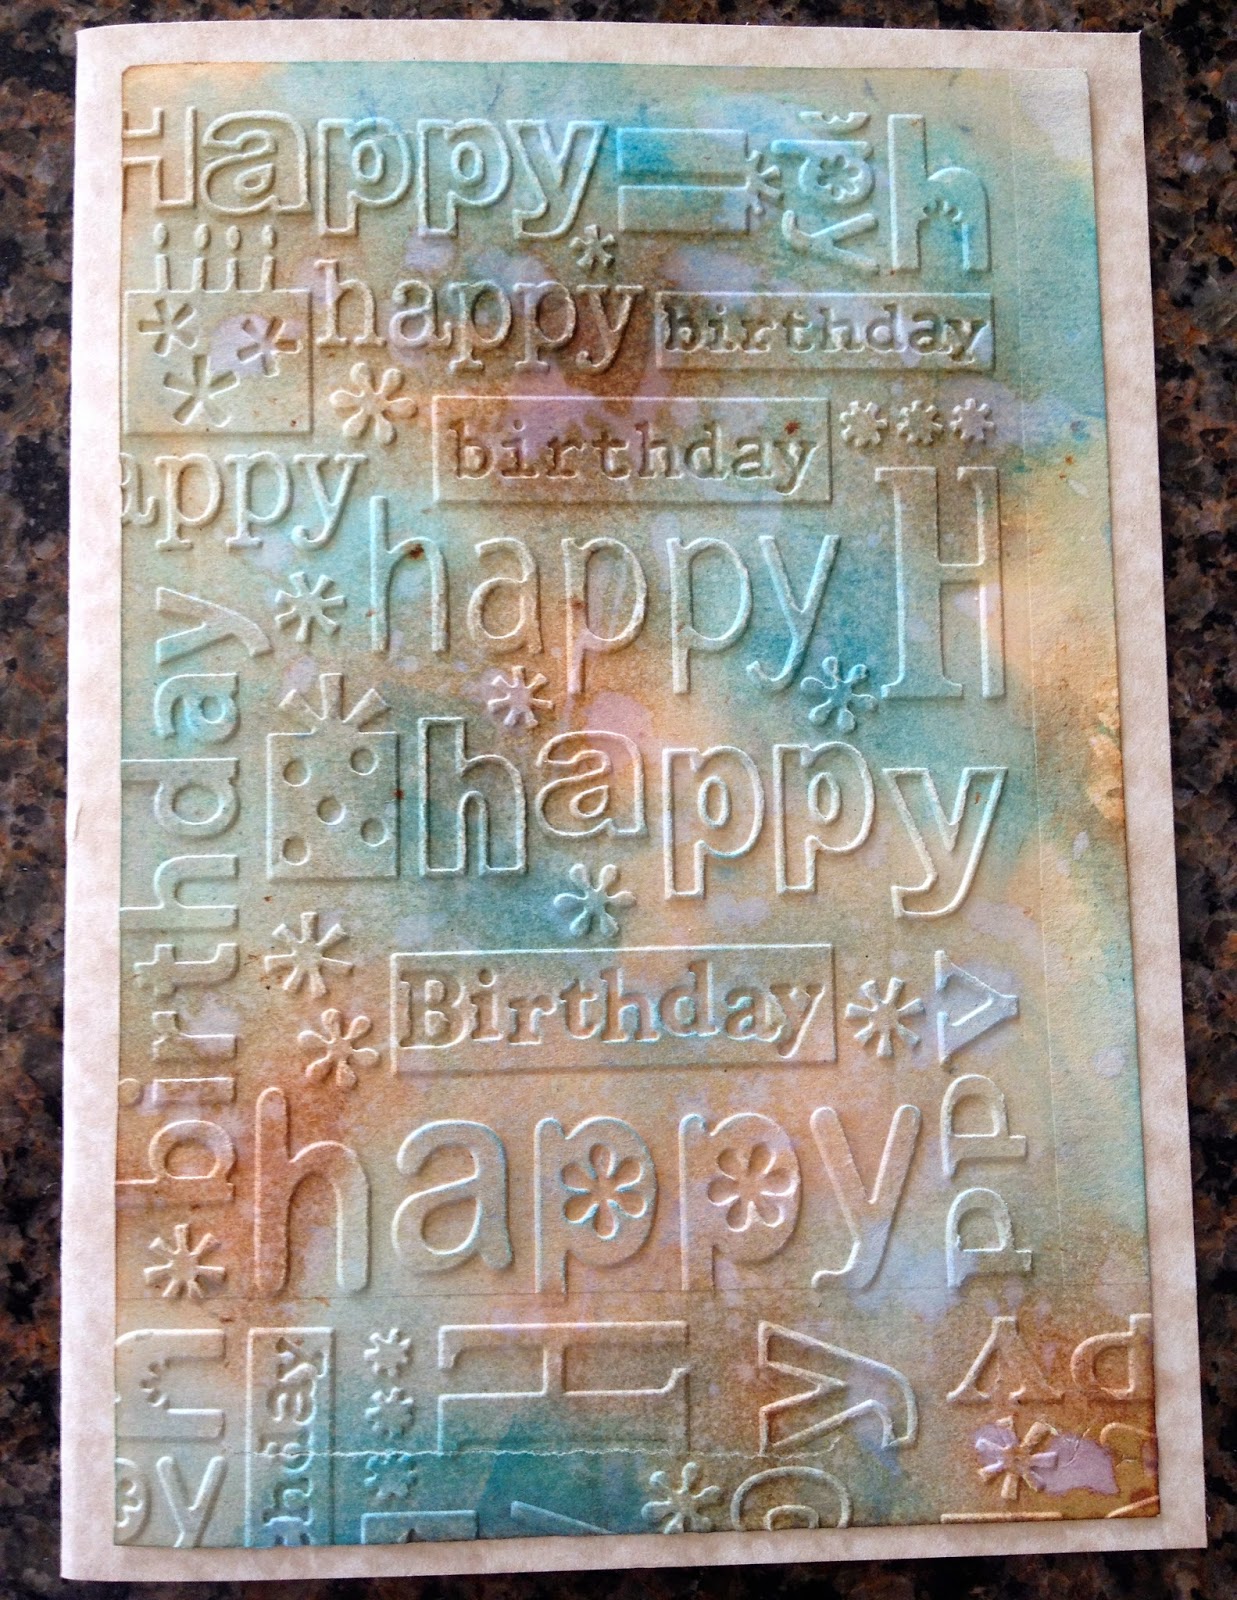
The inked paper I had on hand, so all I had to do was run it through my Big Shot using a birthday embossing folder.

A great friend from high school is having a birthday this week. The inspiration for her card was a sentiment stamp I'd been wanting to use. Although it's not really a birthday sentiment, I think it still works.
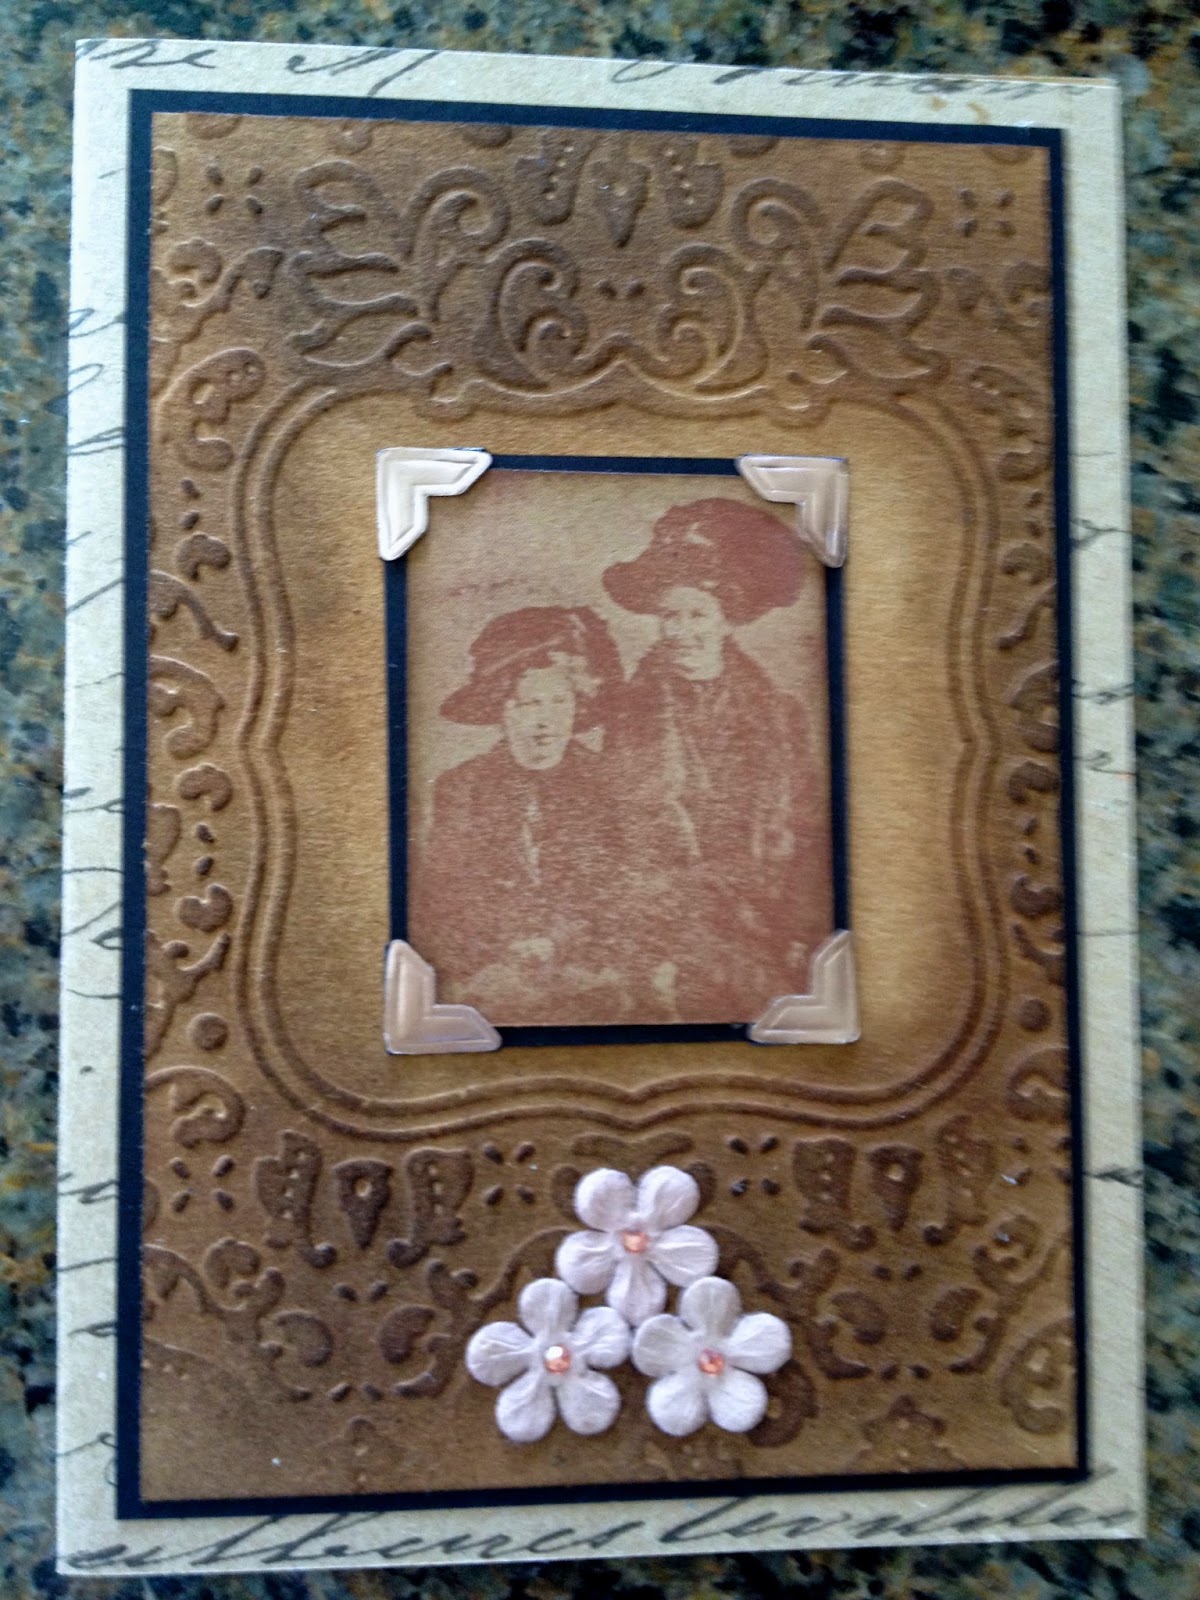
The faux leather frame was created using a new Spellbinders M-bossabilities reversible embossing folder. 

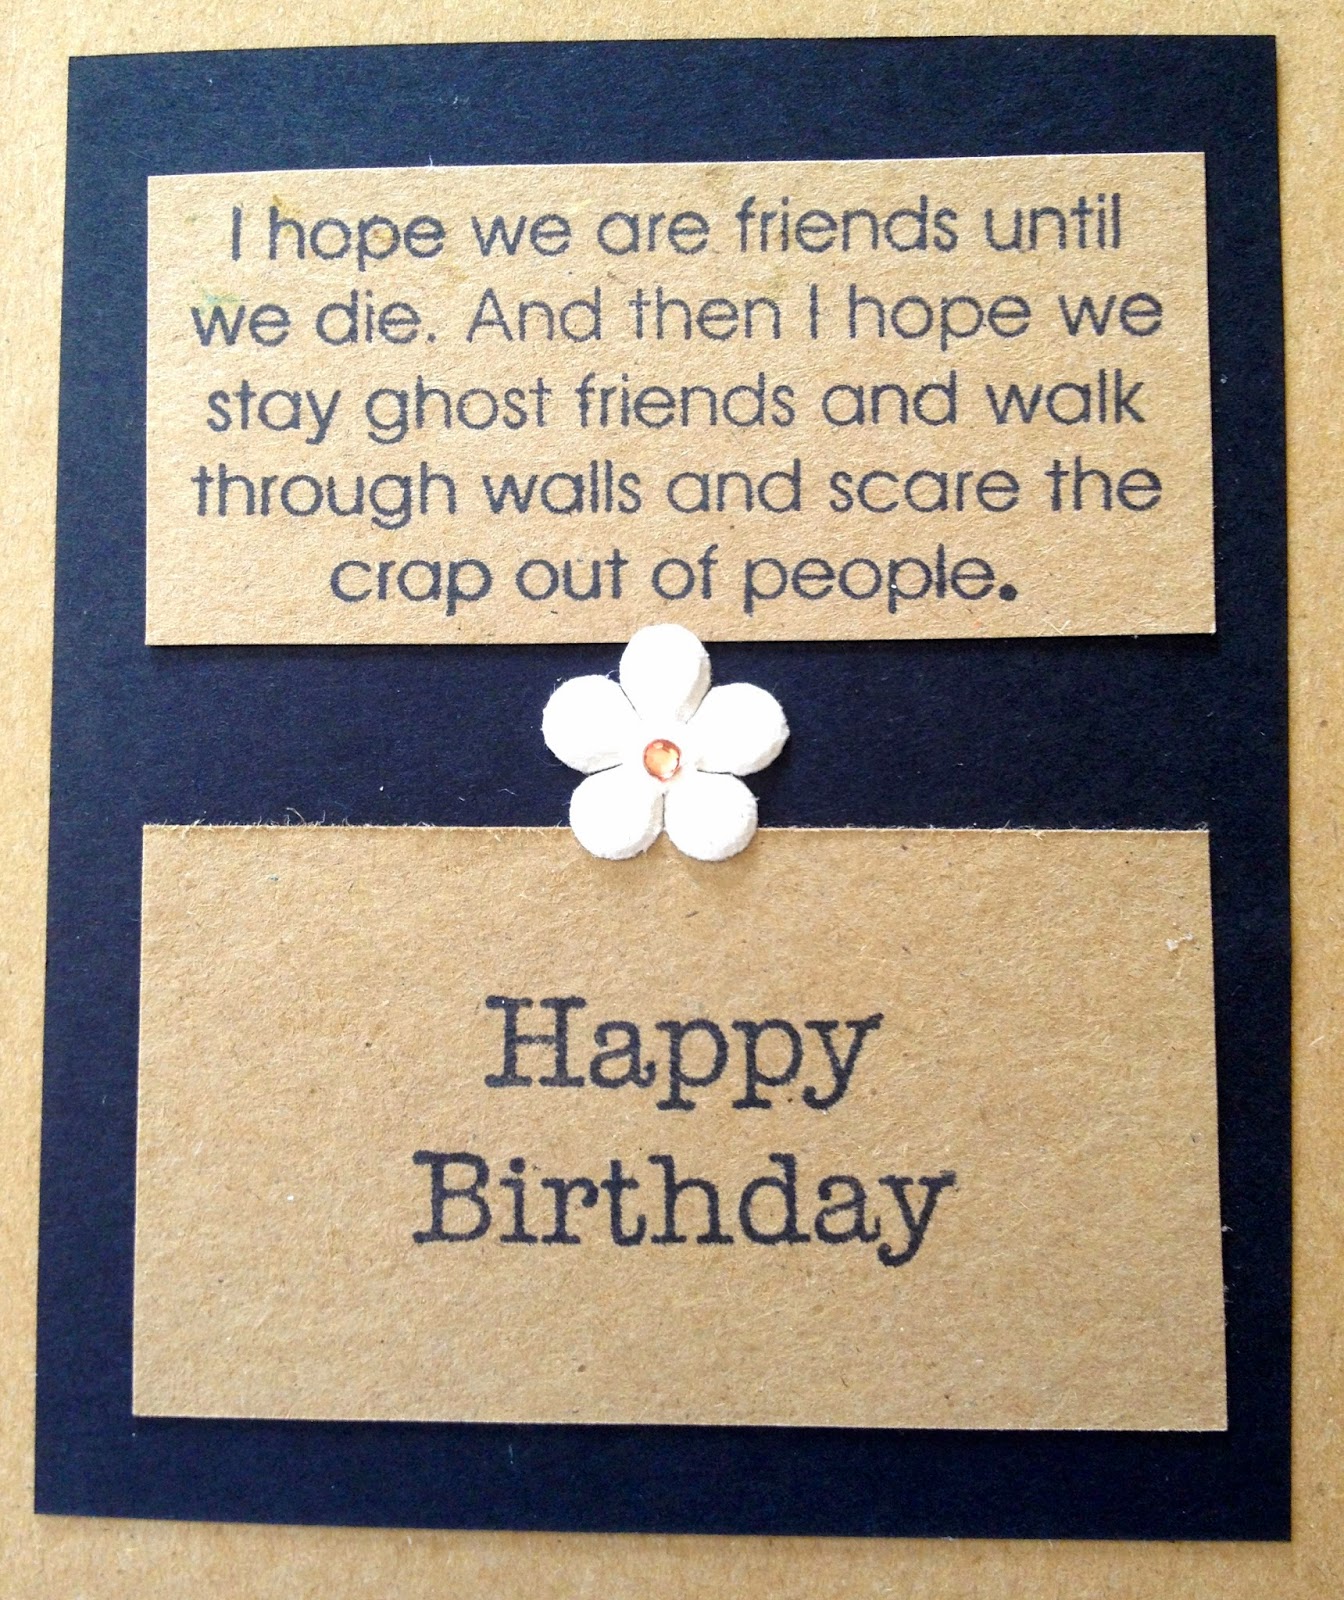
I'm going to use the same sentiment on a Halloween card for another high school friend.

Our niece had back surgery this week and is now recuperating at home. I spent a long time working on her card, then I forgot my idea for the sentiment I wanted to use! I ended up ditching that one and making this instead.
(cover)
(inside)
I'll take a picture of my new work area soon.

Monday, August 25, 2014

Bookmarks

A good friend at church came up with the idea of welcoming new babies in the congregation with a bag of goodies. One of my friends makes the cloth totes with adorable appliqués, our quilters group contributes beautiful baby quilts, another person makes burp cloths, and also included are assorted goodies plus devotionals for the new moms. I was asked to make bookmarks for the devotionals so I recently made a batch of laminated ones using the Bible verse, "Children are a gift of the LORD. They are a reward from Him." Psalm 127:3


Saturday, August 23, 2014

Catching up on Cards

I can't believe it's been over a month since I've been on my blog. All those posts for that online watercolor class I took wore me out and put me off blogging for quite a while. Guess I should get into a better blog posting routine. Any how --- I have been busy crafting. I spent hours making decorations, favors, covered pretzels, cupcake pics, a banner and a centerpiece for a baby shower and then realized I never took any pics prior to the shower and now everything is pretty much gone! I do have one squished favor box and a stray cupcake pic so I may try to put a post together on it at some point.

There have been many cards to make in the past month and needless to say, I never got around to photographing some. Here are the ones I remembered to snap before sending. 

This summer my birthday took me by surprise - it was my big six-five (it doesn't look as bad written in words as it does in numerals).  I have a friend from high school who was a year behind me and is still a youthful 64. His wife decided to throw an un-birthday party for him before he hits 65 entitled, "When I'm 64." For his card I added his frosh h.s. pic scanned from the yearbook (it was taken in the fall of 1964) and added it to one of Beatles' pics I found. So the card read, "From '64" (and on the inside) "To 64. Birthday greetings bottle of wine!" from the song lyrics. The party was really fun!


My mom turned 91 in July (our birthdays are only two days apart) so I made a bunch of teeny tiny tissue pink paper roses for the front of her card. That's the last time I'll make any more of those!!! They took hours to make.

Here are a few more cards that I made for family members and remembered to take pictures of.
It's hard to see from the photo but I heat embossed script in white before adding the watercolor stamped flowers.


I cut squares out of alcohol inked glossy paper and then heat embossed stamped flowers in white.

I did a CASE card using a newish SU flower stamp and frame-lit set.

We also had a wedding to go to last month and fortunately I had made a wedding card a while back that I could use. 
It's a bit overdecorated but I was trying out several new techniques at once and just couldn't stop myself!

That's all for now. I'm SO SAD that summer is almost over because I H-A-T-E winter with a passion. At least I didn't have to go back to the classroom just about the time that summer temps decided to make their appearance! Thanks to a lifetime mostly spent in educational settings, I still get the urge to go out and stock up on school supplies :)

Wednesday, July 9, 2014

Father's Day

My Stampin' Up demonstrator (and new friend!) Laura showed us how to create a flip card at the workshop she did at my house at the beginning of June.  I had already exceeded my order budget with wonderful SU goodies so didn't buy the thinlit die, especially since I usually make 5x7 cards instead of the smaller A2 size.  

Previously I had watched several You Tube demos on how to make your own flip cards. I thought I'd give their method a try without using a special dedicated flip die. The cards looked really easy but in reality were nearly impossible to make even though I swear I followed their instructions to a T.  I finally did a partial flip card (easier to control the cut with my nestability die) which I used to make this Father's Day card for my son.


Here is the one I made for my husband. I've been into hexagons lately for some reason. I created my own die cut on my Cricut Mini. Then I used Tim Holtz pumice stone distress embossing powder on it for texture and glued the honeycomb to my card base. I found an alpha stamp set whose letters fit perfectly in the openings --- and fortunately I had the right amount of openings for symmetry. I made the openings the same size as the fun hexagonal stamps that I have.


Thursday, June 12, 2014

Card Frenzy

We're delighted to have our 2 1/2 year old grandson staying with us for two weeks, but I now have little time to devote to crafting. However I had a lot of cards that needed making so I've been finding moments to squeeze them in.

My daughter-in-law is arriving tomorrow after finishing her 5 year radiation oncology residency in Boston. Before leaving for their new home in Seattle, she'll spend a week with us but will spend most of her time studying for the second part of her boards which she will take next month. I wanted to make her a congratulatory card to commemorate her long years spent in medical school and residency, and I wanted it to be really joyful. For her card I did a watercolor background topped with sparkly gems and stars.


I then gave my grandson some stickers to choose from and let him make his mom a card too. Inside he added his own "message" and signature!


Last night my husband, son, grandson, and I we went out to eat with my sister and brother-in-law to celebrate his birthday. I've always loved this "vintage" picture of him taken with his three oldest children - all in costume. I used it as the centerpiece for his CASE birthday card inspired by Kate Palmer


I've also been busy making Father's Day cards which I will post soon.

Friday, June 6, 2014

Anniversary Watercolor

Kristina Werner was one of the instructors for my online Watercolor class, and I've been following her blog ever since. Today she posted a really neat emboss resist watercolor card that I wanted to try. As it is my son and daughter-in-law's anniversary, I thought it would work perfectly. I didn't have a dahlia stamp so I had to improvise with daisy stamps and a watermark pen. Hope they  like it!


Thursday, May 22, 2014

Bonus Day - Watercolor for Cardmakers

I thought I would just play with some of the techniques we learned and incorporate them into some of my own cards.

Here I used soft watercolors in the background and then I stamped a background stamp in gray and added a couple of blue spirals. I lightly misted the stamped flowers and added a couple of butterflies made with a Martha Stewart punch.


For this birthday card I embossed a background stamp in white, lightly watercolored a section of the background, and stamped text in distress ink on the right. 


One of my favorite watercolor techniques is inking up stamps and misting them before stamping them. I prefer to use the first generation stamp even though it's not as translucent as the second is. This uses one of my favorite, go to flower stamps.


This card I just made for a friend who is recovering from surgery (and it doesn't have any of the watercolor techniques :) You can see I used the same stamp. 


Saturday, May 17, 2014

May 2014 Tag


The last two weeks I've done nothing but watercolor projects for the online class I was taking. Today I set aside for making my Tim Holtz tag of the month. 

I like the tiled effect he achieved and his use of trinkets and baubles. Since I have quite a stash (read: hoard) of embellishments, this looked to be right up my alley. I gathered my goodies, grunged up a tag, and was ready to go.

The most tedious part of the tag was measuring, cutting, and covering the chipboard tiles with assorted papers. (I think I should have used thicker chipboard to give the tag a bit more dimension.) Since I didn't have any of the new shadow press embossing folders, I had to make due using a stencil and then shading it in by hand. 


After arranging and rearranging my elements I took a picture so I would remember its composition. First I taped the tiles to the tag and then I used Glossy Accents to attach my metal trinkets to the tiles. I thought it needed a few pink tones so I retroactively applied some Victorian Velvet to a few areas. Then I used a few stick on metallic studs in a couple of the open areas.


As much as I loved my class, it felt good to get grungy again after two weeks of watercoloring!

Friday, May 16, 2014

Alien in Space

Today I tried Jennifer R's galaxy background using sea salt and white splatters. What would space be without a goofy alien?


This is a quick technique and I think the card with 'You're Invited' replacing 'Happy Birthday'  would make a cute invitation for a child's birthday party.


Day 11 - Watercolor for Cardmakers

Today was a play day with our watercolors. The first video was done by my fave --- Tim Holtz! I used my bubbles layering stencil to create the background and was pretty happy with the results. I stamped a pear that had been inked with distress markers and then lightly blended the colors with water after it was stamped. I attached it using foam tape and stamped one of my TH sentiments in Ranger archival black ink.


I'm sure that I will use this technique again.

Day 10 - Watercolor for Cardmakers

Day 10 was more watercolor freehand. Since I knew I couldn't do Jennifer's freehand painting, I tried Jean's method of tracing a stencil using watercolor pencils and then adding ink from distress markers. I doubt if I will do it again, but here's what I came up with for the front of a card.


The class is over Saturday, so the end is in sight!


Wednesday, May 14, 2014

Day 9 - Watercolor for Cardmakers

I AM FINALLY CAUGHT UP AND ON SCHEDULE!!!  Although I know there is no time limit to complete this online class, it's much more fun to be able to post our cards the day that they are assigned.

First of all let me preface this by saying that I have absolutely no innate artistic ability!!!  Unfortunately when I draw or paint freehanded, my results look exactly the same as they did when I was in grade school. It's true! The style is unmistakably mine and remains unchanged over these many years. However today's examples weren't too intimidating and were pretty basic so I dove in headfirst.

The card you see uses Jennifer's splashing and splattering method. I made a big mess and had to remove quite of bit of stray paint from unwanted areas, but all in all it's recognizable (isn't it?) as a tree. I found that the cheapy brush that comes with a kiddy paint set worked the best for this splattering. 


Tuesday, May 13, 2014

Day 8 - Watercolor for Cardmakers

Day 8 has had my favorite techniques so far.  It really helps if you have the same stamp used in the video or something quite similar. That way the step by step instructions don't have to be modified (or leave us totally lost!). 

Tasnim's beautiful flower was an inspiration, and the water on water process has been one of the more successful for me. I should have heeded her advice to weigh down the piece before mounting it to the card, but I was too impatient to wait!


I also really enjoyed watching Dawn's process which I tried to recreate here. I think I should have left it alone without attempting to do the background. It was really prettier before I added mine so maybe I will try it again (when I'm not so busy trying to keep up with our daily homework).

I'm going to save this card and give it to my husband next month for our anniversary. This piece also warped despite the amount of adhesive I laid down. Hope I can get it flattened more after it's already attached!

Monday, May 12, 2014

Day 7 - Watercolor for Cardmakers

I have spent the entire day in my craft room trying to catch up on my watercolor homework. I have hundreds of stamps and closets and drawers full of supplies. However, I didn't have anything that worked for Dawn's technique today. To try and get passable leaves I used a die and cut foam. My foam was too thick so I broke one of my acrylic plates. Luckily I had new ones. I inked up the foam faux leaves stamp first, and I guess the results are passable. However, I absolutely HATE the results I got from my dumb flower stamp (but it was the closest I could find).  I am embarrassed to post it -----but here it is.